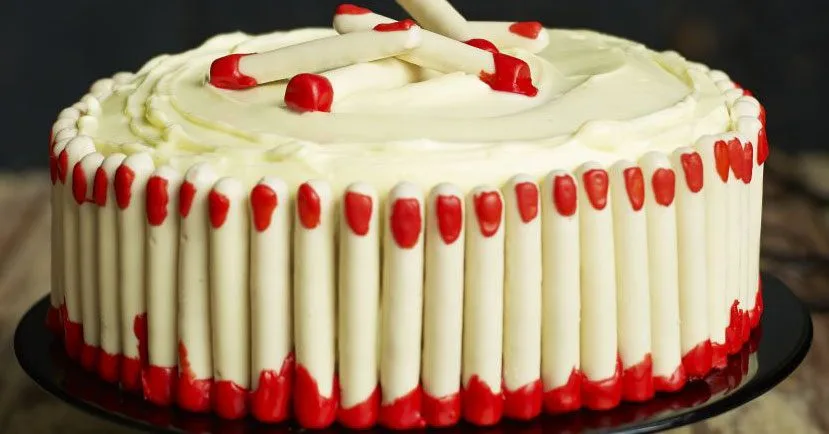
Freaky finger red velvet cake
Terrify and delight this Halloween with a dramatic chocolate red velvet cake, sandwiched with an easy cream cheese frosting
Ingredients
12 serv.- soft butter175g g
plus extra for greasing
- white caster sugar↗225g g
- vanilla extract↗1 tsp tsp
- large eggs↗3
at room temperature
- red food colouring↗1 tbsp tbsp
paste (we used Christmas red from Sugarflair)
- plain flour↗200g g
- cocoa powder↗50g g
(we used Green & Black's)
- bicarbonate of soda↗1 ½ tsp tsp
- baking powder↗½ tsp tsp
- salt↗¼ tsp tsp
- pot low-fat plain yogurt↗150g g
loosened with 2 tbsp milk
- boxes white chocolate fingersabout 3 x 114g
(we found them in Tesco)
- icing sugar↗140g g
- milk↗2 tsp tsp
- of red food colouring↗small blob
paste
- soft butter100g
- full-fat cream cheese↗300g
fridge cold (we used Philadelphia as it has the firmest texture)
- orange↗zest 1
(optional)
Step-by-step instructions
- 1
Heat oven to 180C/160C fan/gas 4. For the cake, grease 2 x 20cm sandwich tins and line the bases with baking parchment. Cream together the butter, sugar and vanilla, then add the eggs, one at a time, beating well after each egg, until fluffy and light. Beat in the colouring.
- 2
Mix the dry ingredients for the cake, and sift half onto the creamed mix. Fold in with a spatula, followed by half of the thinned yogurt. Repeat, then spoon the smooth batter into the tins and level. Bake for 25 mins or until risen and springy when pressed lightly in the centre. Cool for 10 mins, then turn out onto a wire rack and cool completely.
- 3
For the fingers, line a baking tray with parchment. Cut one end from each chocolate finger. Mix 50g icing sugar, the milk and a small blob of colouring to make a thick, red icing. The icing needs to be thick to stay put; add a little more sugar if you need to. Dip the severed biscuit ends into the icing, let the excess drip off, then paint a red fingernail on the other end, using a small paintbrush. Leave to dry on the parchment.
- 4
For the frosting, use an electric mixer to beat the butter well until very smooth, then beat in the cream cheese and the zest (if using) until even. Sift in the remaining icing sugar, then fold it into the cheese mixture using a spatula until smooth. Don’t overbeat. Chill until needed.
- 5
Sandwich and cover the top and sides of the cake with the frosting – you will only need a thin layer on the sides of the cake to stick on the chocolate fingers. Stand the severed fingers around the cake in a neat collar, pressing them lightly into the frosting. You’ll have a few left over to put on the top. Keep the cake in the fridge but enjoy it at room temperature.

The Prepka App Is Ready
All your recipes at your fingertips — in the Progressive Web App