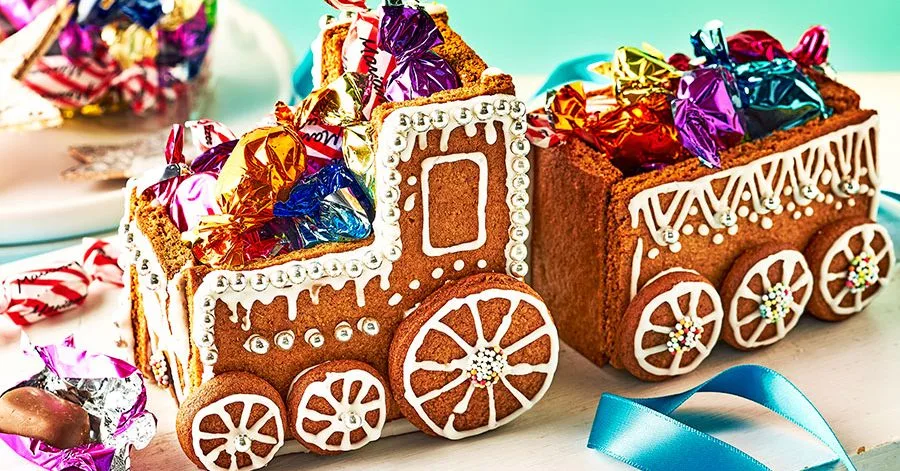
Gingerbread train
Per serving
Create this cute gingerbread train for a fun Christmas centrepiece. The dough makes more than you’ll need, but having extra makes it easier to cut out neat shapes
Ingredients
10 serv.- dark muscovado sugar↗175g g
- golden syrup↗85g g
- butter↗100g g
- plain flour↗350g g
plus extra for dusting
- bicarbonate of soda↗1 tsp tsp
- ground ginger↗1 tbsp tbsp
- ground cinnamon↗1 tsp tsp
- egg↗1
lightly beaten
- icing sugar↗200g g
- silver balls↗sprinkles and edible
sprinkles and edible
- sweetsmixed wrapped
mixed wrapped
Step-by-step instructions
- 1
Put the sugar, syrup, butter and a pinch of salt in a saucepan set over a medium heat and bubble for 1-2 mins, stirring to combine. Remove from the heat and set aside. Tip the flour, bicarb and spices into a large bowl, pour over the warm syrup mixture and egg, stirring to combine. The dough will seem soft, but will firm up in the fridge. Cover and chill for at least 30 mins, or overnight. Will keep wrapped in the freezer for up to two months.
- 2
Heat the oven to 200C/180C fan/gas 6 and line two baking trays with baking parchment. Dust the work surface with a little flour and divide the dough into two large balls. Roll each ball out to the thickness of a £1 coin and use the downloadable template to cut out the train parts A-D. You will need two A pieces, one B piece, two C pieces and three D pieces, plus 10 small wheels (about 2cm in diameter) and two larger wheels (about 4cm in diameter). Use biscuit cutters or the wide end of a piping nozzle to stamp out the wheels. Use what remains for gingerbread stars or people, if you like. Transfer all the pieces to the prepared trays.
- 3
Bake for 10-12 mins, swapping the trays around halfway through, until slightly risen and golden brown. The gingerbread will expand as it bakes, so trim back into shape while still warm using a small sharp knife and the templates again. Leave to cool completely on the trays.
- 4
For the decorations, mix the icing sugar with just enough water to make a thick icing the consistency of melted chocolate. Spoon into a piping bag and snip off the end, then draw windows on the A pieces, spokes on the wheel pieces and any other decorations you like, adding the sprinkles and balls while the icing is still wet.
- 5
To assemble the driver’s carriage, use the icing to glue the two A pieces to the B piece (for the taller back of the carriage), then glue one of the D pieces to the front. For the second carriage glue the two C pieces together with two D pieces. Use cans to support the sides while the icing sets, if needed (at least 30 mins). Glue three small wheels to both sides of the second carriage. Glue one large wheel to the back of the driver’s carriage, on both sides, then two small ones beside those. Leave to set for another 30 mins.
- 6
Use any leftover icing to decorate the train, sticking sprinkles and silver balls to its sides. Leave to set for a final 30 mins, then fill the carriages with the wrapped sweets. The assembled train will keep in an airtight cake tin or on display (covered overnight to protect from dust) for up to four weeks.

The Prepka App Is Ready
All your recipes at your fingertips — in the Progressive Web App